Your driveway is more than a simple path leading to your home — it’s a vital part of your property’s structural landscape. Day after day, it supports the weight of vehicles, endures the extremes of heat, cold, and rainfall, and faces exposure to oils, dirt, and chemicals. Over time, weather, wear, and soil movement can cause cracks to form, making it essential to fix driveway cracks as soon as they appear.
While an essential first step in preserving your driveway is to fix driveway cracks, the process doesn’t end there. Sealing and protecting your driveway afterward is what truly determines how long your repairs will last and how well your driveway can resist future damage.
In this comprehensive guide, we’ll dive deep into every aspect of how to seal and protect your driveway after fixing cracks — from understanding why cracks form to choosing the right sealing products, maintaining proper drainage, and linking driveway health to the overall condition of your concrete slab foundation, pier and beam, or other home support systems.
Understanding Why Driveway Cracks Form
Before learning how to fix driveway cracks, it’s important to understand why they form in the first place. Common causes include:
- Soil Movement: Changes in the ground beneath your driveway — particularly in clay-rich soils like those in Houston — can cause expansion and contraction. This movement stresses the concrete, leading to cracks.
- Poor Drainage: Standing water or improper slope can weaken the sub-base, allowing cracks to spread.
- Heavy Loads: Repeated pressure from vehicles or equipment can cause surface fractures over time.
- Freeze-Thaw Cycles: In cold climates, water seeps into small gaps, freezes, and expands — widening the cracks.
Each of these issues requires a slightly different approach when you fix driveway cracks. For instance, if poor drainage is the root cause, foundation repair or concrete leveling may be necessary to ensure the surface remains stable after the repair.
Why Fixing Cracks Is More Than Cosmetic
At first glance, cracks in your driveway might seem like a purely cosmetic issue — small blemishes on an otherwise functional surface. However, every experienced contractor will tell you that fixing cracks is far more important than it looks.
When left untreated, cracks become entry points for water. During rainy seasons, moisture seeps into the sub-base beneath your driveway, washing away soil and creating air pockets. In colder climates, that same trapped water freezes and expands, widening cracks and forcing the concrete or asphalt apart. This cycle can transform minor surface blemishes into significant structural damage in just a few years.
Additionally, small cracks often serve as early indicators of deeper issues, such as:
- Soil erosion or compaction beneath your driveway
- Foundation settlement near your garage or entryway
- Water redirection toward your home’s concrete slab foundation or pier and beam supports
Timely fixing driveway cracks not only improves your home’s appearance but can also prevent future foundation repair needs caused by water intrusion and shifting soil.
Step 1: Thoroughly Assess the Driveway Before you Fix driveway Cracks
Every good repair begins with a careful inspection. Before you start fixing cracks, take time to analyze the type, location, and severity of the damage. Cracks can tell you a lot about what’s happening beneath the surface.
Types of Driveway Cracks:
- Hairline Cracks: These are thin, shallow lines that usually occur as the concrete cures or as asphalt ages. They may seem harmless but can grow if not sealed promptly after fixing cracks.
- Alligator Cracks: Named for their reptile-skin appearance, these interlinked fractures often indicate base-layer failure — a problem that sometimes points to poor drainage or soil movement under the driveway.
- Edge Cracks: Found along the outer boundaries, they typically result from poor soil support or heavy vehicle stress.
- Settlement Cracks: These occur when the soil beneath the driveway shifts unevenly, causing sections to sink or tilt. This kind of damage is closely related to larger issues like house leveling or foundation repair.
Take a slow walk around your driveway after rainfall — moisture collects along the weakest points. Those puddles often mark spots that need attention beyond just fixing cracks, such as grading adjustments or improved drainage to protect your home’s foundation system.
Step 2: Prepare the Driveway Surface for Effective Repair
Cleaning and preparation are the most overlooked steps when you fix driveway cracks, yet they determine whether your repair lasts for months or decades. Filler and sealant adhere best to clean, dry surfaces, so removing all dirt, oil, and vegetation is essential.
How to Prepare the Surface Properly:
- Start by sweeping the entire area to remove dust, pebbles, and debris.
- Use a pressure washer to deep-clean the surface, especially around cracks where dirt accumulates. For oil or grease stains, apply a degreaser before washing.
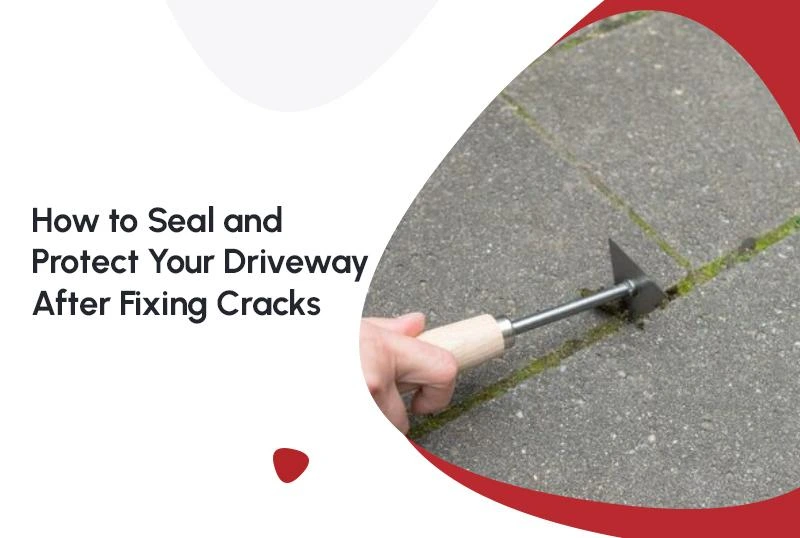
- Pull out any weeds or roots growing through the cracks. Vegetation left behind can push the crack wider over time.
- Dry completely. Even a small amount of moisture can prevent proper bonding of your filler or sealant. Allow at least 24 hours of drying time before proceeding.
Homeowners in humid regions, such as Houston or New Orleans, often find that morning cleaning followed by afternoon drying works best before beginning to fix driveway cracks later in the day.
Step 3: Choosing the Right Material to Fix driveway Cracks
Not all cracks — or driveways — are the same. The material you choose to fix driveway cracks depends on whether your driveway is asphalt or concrete, as well as the climate and load it endures.
For Concrete Driveways:
- Polyurethane Sealants: Flexible and weather-resistant, perfect for climates with temperature swings.
- Epoxy Fillers: Ideal for deeper or structural cracks, offering strong adhesion and durability.
- Hydraulic Cement: Expands slightly as it cures, sealing out water effectively.
For Asphalt Driveways:
- Rubberized Asphalt Crack Filler: Expands and contracts with heat, ideal for flexible surfaces.
- Cold Patch Compounds: Great for larger holes or areas that need reshaping.
If cracks are forming repeatedly despite repairs, this may point to soil instability beneath the slab — in which case, you may need to explore under slab tunneling or foundation repair to stabilize the ground before resurfacing.
Step 4: The Proper Technique for Fixing Cracks
The method you use to fix driveway cracks is as important as the materials themselves. A rushed or uneven application won’t last long, especially in areas exposed to heavy traffic or shifting soil.
Concrete Repair Steps to Fix Driveway Cracks:
- Clean the crack thoroughly using a wire brush and vacuum to remove loose particles.
- Widen the crack slightly into a V-shape. This helps filler penetrate deeply and anchor securely.
- Apply the filler slowly, starting from the bottom and working upward to avoid air pockets.
- Smooth the surface with a trowel, ensuring it’s level with the surrounding concrete.
- Allow to cure fully — most sealants require 24–48 hours before they can be sealed or driven on.
Asphalt Repair steps to fix Driveway cracks:
- Trim rough edges around the crack to ensure clean application.
- Pour the filler steadily, filling it slightly above the surface to allow for compaction.
- Use a tamper tool to flatten and level the area.
- Let it cure for the manufacturer’s recommended time before sealing.
In both cases, patience is key. Rushing the process can trap air or moisture, undoing your fixing cracks efforts within months.
Step 5: Seal the Driveway After Fixing Cracks
Once you’ve finished fixing cracks, sealing is your driveway’s protective armor. Sealants prevent moisture intrusion, resist UV degradation, and restore that sleek, uniform appearance.
Types of Sealers to Choose From:
- Acrylic Sealers: Offer UV resistance and enhance color. Great for decorative or stamped concrete.
- Epoxy Sealers: Extremely strong, creating a glossy, chemical-resistant finish.
- Asphalt Emulsion Sealers: Perfect for blacktop driveways, providing flexibility against temperature changes.
- Penetrating Silane/Siloxane Sealers: Absorb deep into the concrete pores, forming a hydrophobic barrier that repels water without changing the surface texture.
Application Method:
- Clean the surface again to remove dust from your fixing cracks process.
- Edge carefully with painter’s tape to protect adjacent surfaces.
- Apply evenly using a roller or squeegee, starting from one corner and working systematically.
- Allow to cure for 24–48 hours without vehicle traffic or heavy moisture exposure.
When properly applied, sealants extend the life of your driveway by years, especially when combined with routine maintenance after you fix driveway cracks.
Step 6: Maintain and Protect Your Driveway Long-Term
Sealing your driveway isn’t a one-and-done job — it’s part of an ongoing maintenance cycle. After fixing cracks and sealing, consistent care helps your driveway remain smooth, durable, and visually appealing.
Essential Maintenance Tips:
- Inspect annually: Look for new cracks or changes in slope that might signal soil movement.
- Reapply sealer every 2–3 years: Frequent sealing strengthens the top layer against UV and water damage.
- Clean spills quickly: Oil, antifreeze, and other automotive fluids break down sealants.
- Avoid de-icing salts: Use sand instead to maintain traction in winter.
- Maintain proper drainage: Redirect gutters and downspouts so water doesn’t collect near the driveway — an often-overlooked cause of cracking.
Example: One Houston homeowner who followed a strict resealing schedule every three years after fixing cracks reported a flawless surface even after a decade of heavy use, while their neighbor — who ignored sealing — needed full resurfacing within five years.
When Fixing Cracks Isn’t Enough
Sometimes, the solution is not to fix driveway cracks because the problem lies deeper than the surface. If your driveway repeatedly develops cracks or shifts unevenly, this may point to soil instability or drainage failure beneath your slab.
Red Flags That Indicate Deeper Issues:
- Driveway sections sinking or tilting
- New cracks appearing within months of repair
- Water pooling near the foundation
- Visible separation between driveway and garage slab
In such cases, addressing foundation repair or under slab tunneling might be necessary. These techniques help reinforce the base layer of your concrete slab foundation, ensuring that surface repairs remain stable.
Eco-Friendly Options to Fix driveway Cracks and Seal Driveways
Sustainability doesn’t have to come at the cost of durability. Many eco-conscious homeowners now use environmentally friendly materials for fixing cracks and sealing surfaces.
- Water-based acrylic sealers reduce VOC emissions and odor.
- Bio-asphalt fillers use plant oils instead of petroleum.
- Recycled rubber compounds create flexible, durable fillers.
These products are safe for nearby landscaping, improve air quality, and still provide lasting protection when used correctly.
Professional vs. DIY: When to Call the Experts
Minor fixing cracks jobs can be DIY projects, but professional help is often the smarter investment when cracks are wide, recurring, or related to structural issues.
DIY is Suitable When:
- Cracks are smaller than ¼ inch and shallow.
- There’s no visible sinking or foundation separation.
- You have time for thorough preparation and sealing.
Hire a Professional When:
- Cracks reappear after every repair.
- The driveway is uneven or sinking.
- You suspect drainage or soil instability near your house leveling or foundation repair zones.
Professionals can perform a detailed inspection, identify whether your soil or foundation contributes to the issue, and use advanced techniques — such as pier and beam stabilization or under slab tunneling — to ensure long-term stability.
Final Thoughts
Learning how to seal and protect your driveway after you fix driveway cracks is about more than maintaining aesthetics — it’s about safeguarding one of the most important structural components of your property.
When you properly fix driveway cracks, apply a high-quality sealer, and maintain the surface regularly, you’re protecting your investment, enhancing curb appeal, and preventing water damage from reaching your foundation system.
A proactive approach today can save you from costly foundation repair or driveway replacement down the line. Whether your home relies on a concrete slab foundation or a pier and beam structure, consistent driveway care plays a vital role in the overall stability and value of your property.
FAQs
1. Is it worth sealing a cracked driveway?
Yes — sealing a cracked driveway is definitely worth it. Sealing prevents water infiltration, which is the biggest cause of further cracking, potholes, and slab shifting. It also blocks dirt, roots, and freeze-thaw damage. Think of sealing as insurance — it protects existing repairs, extends driveway life, and saves you money on future damage.
2. What is the cheapest way to fix driveway cracks?
The cheapest way to repair a driveway is to clean and fill small cracks yourself using a liquid crack filler or caulk-style filler sold at hardware stores. This DIY fix costs between $10 and $50 and is perfect for minor cracks under ½ inch. For bigger cracks, a vinyl concrete patch or asphalt cold patch is still budget-friendly and prevents bigger structural repairs later.
3. How do I fix driveway cracks myself?
You can repair your driveway yourself with these steps:
- Clean debris and loose concrete/asphalt from cracks
- Wash and dry the crack area
- Apply crack filler or patching compound
- Smooth with a trowel or putty knife
- Allow it to cure
- Seal the driveway for long-term protection
This DIY method works for most hairline and moderate cracks. Deep or sunken slabs may need professional help.
4. What is the best concrete driveway crack repair?
For small cracks, a liquid concrete crack filler or polyurethane crack sealant works best.
For medium to wide cracks, use a vinyl concrete patch or high-strength epoxy filler.
For sunken or major fractured sections, concrete slab jacking (or polyjacking) may be required.
Always choose flexible materials — they expand and contract with the seasons to prevent re-cracking.
5. Can I fix concrete cracks myself?
Absolutely — most small to mid-size driveway cracks are DIY friendly. Use:
- Concrete crack filler for hairline cracks
- Polyurethane or epoxy filler for deeper cracks
- Concrete patch mix for wide cracks
Just make sure you clean and prep the crack properly — good prep = long-lasting results.
6. How big of a crack is acceptable in concrete?
Cracks smaller than 1/16 inch (hairline cracks) are usually cosmetic but should still be sealed to prevent moisture intrusion.
Cracks wider than 1/4 inch should be repaired immediately — they indicate structural movement and can worsen quickly, especially in freeze-thaw climates.
7. Is it worth repairing concrete cracks?
Yes — repairing cracks prevents:
- Water damage
- Freeze-thaw cracking
- Slab sinking and lifting
- Weed growth
- Costly structural repairs later
Repairing early keeps your driveway looking good and functioning safely while saving you money.
8. How long does driveway crack filler last?
Driveway crack filler typically lasts 2 to 5 years, depending on:
- Weather exposure
- Traffic load
- Quality of filler used
- Whether the driveway was sealed afterward
High-quality polyurethane or epoxy fillers can last much longer than basic liquid fillers.
9. What is the most durable concrete crack filler?
The most durable crack fillers for driveways are epoxy and polyurethane fillers. They:
- Bond deeply into concrete
- Stay flexible with temperature changes
- Resist water and chemicals
- Last far longer than simple latex fillers
For large repairs, a vinyl concrete patch offers excellent strength.
10. How do you permanently fix cracks in concrete?
To permanently repair concrete cracks:
- Clean out debris
- Inject epoxy or polyurethane filler
- Apply bonding adhesive
- Use a high-strength patch
- Seal the surface afterward
For major sinking or structural issues, polylifting (polyjacking) or slab replacement may be needed for a permanent fix.


